SOFTWARE GUIDE
How to Convert MBOX Files on Mac Platform
Convert MBOX files to PST in Mac OS with user friendly steps. The procedure to perform file conversion is described below with proper screenshots
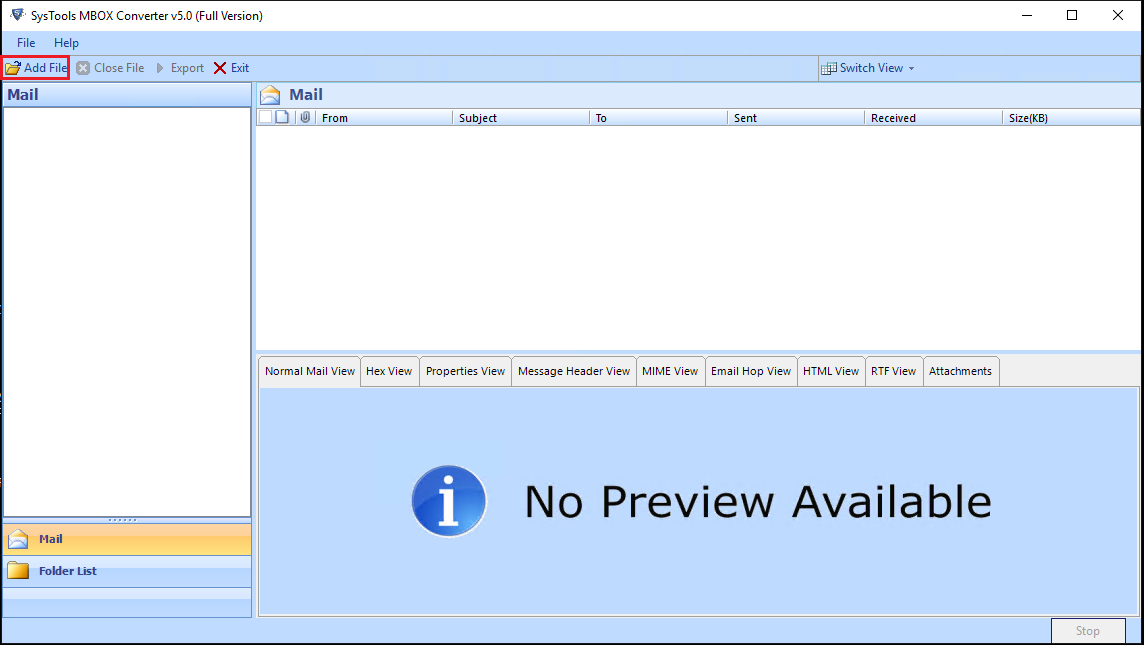
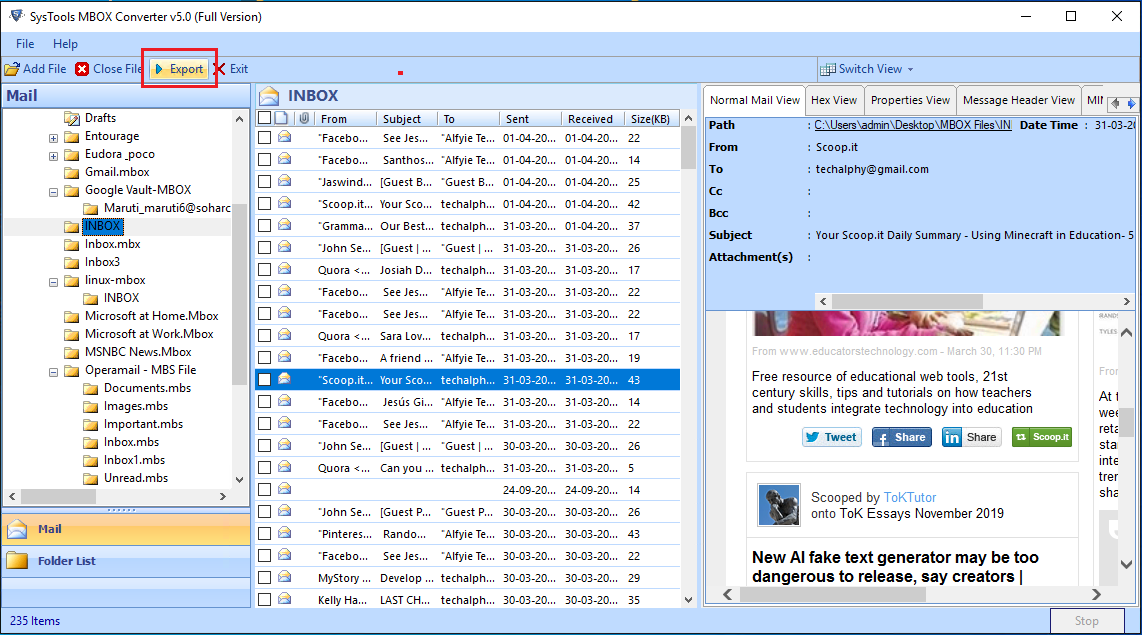
Run the MAC MBOX Converter. The primary interface of the software is as follows:
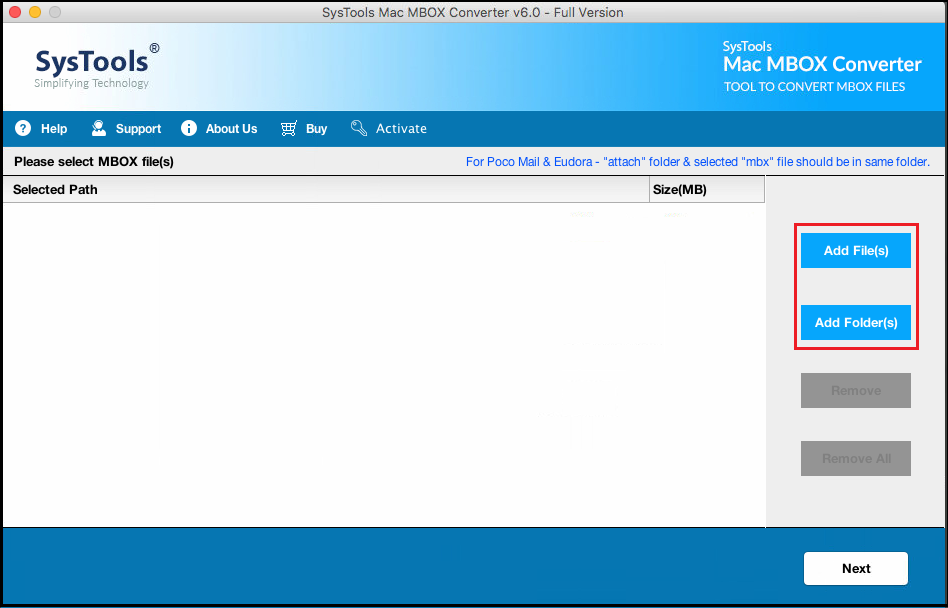
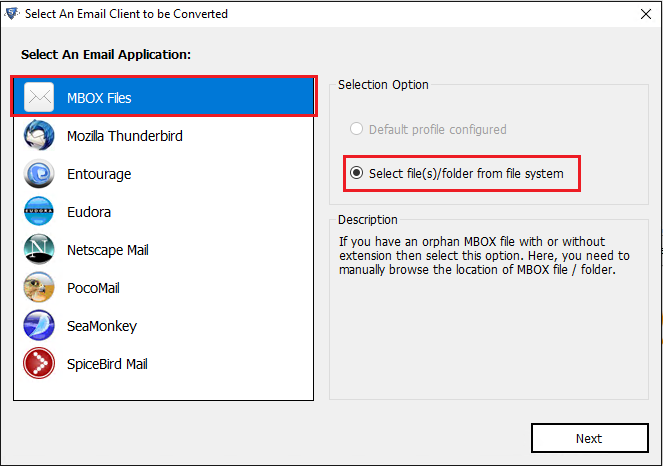
Here, you are offered two MBOX scanning option: Add File(s) & Add Folder(s).
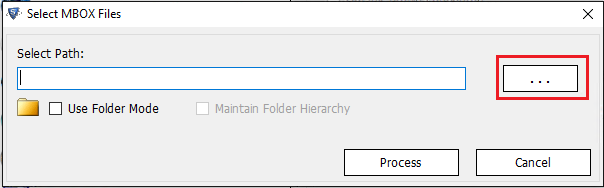
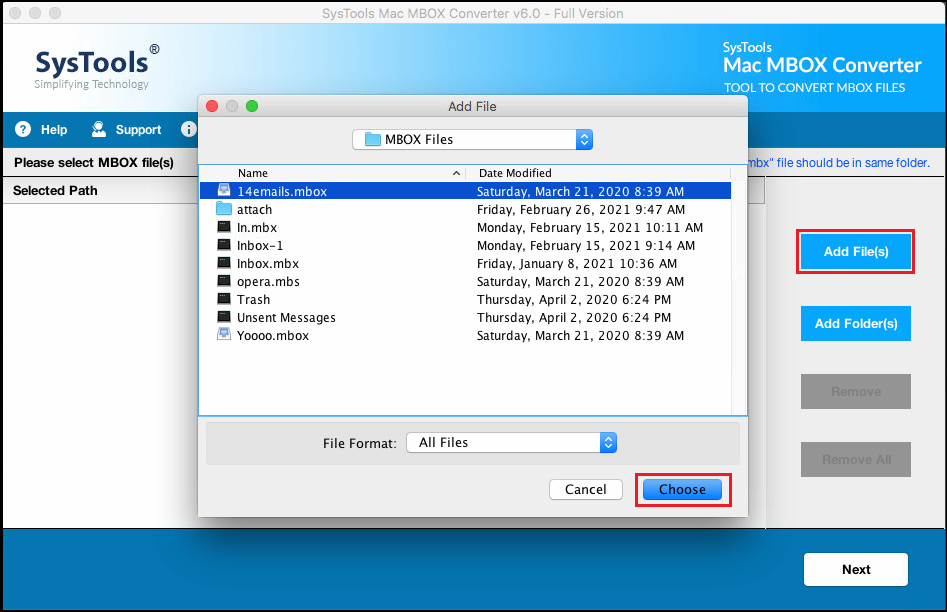
(a) Add File option: Click on Add File(s) option to select single/multiple MBOX files from the Mac system.
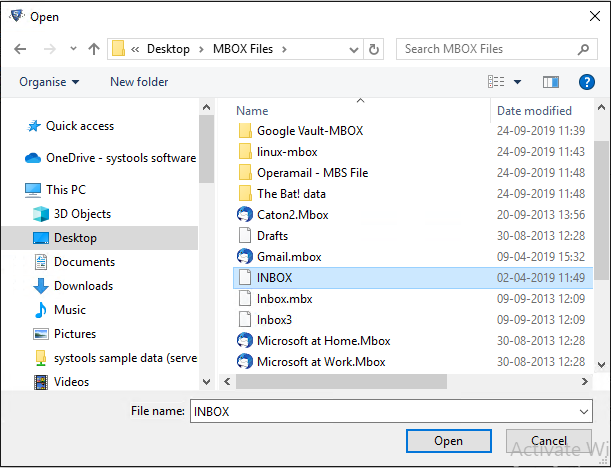
Browse and select the MBOX file on your system, then click on Open button.
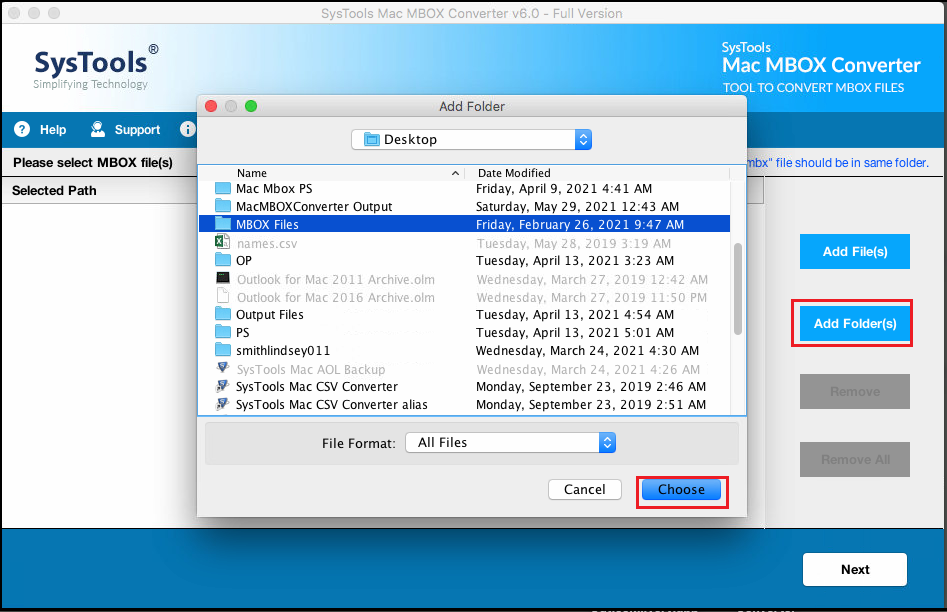
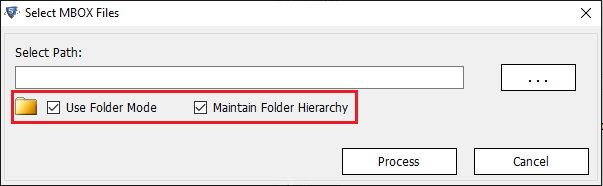
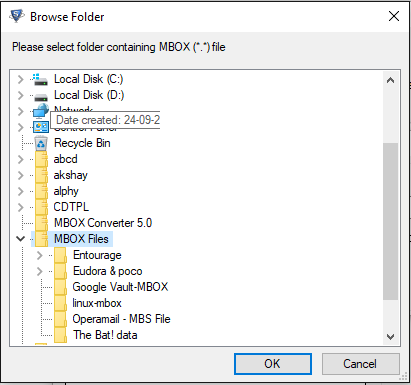
(b) Add Folder option: Click on Add Folder option to add a particular folder containing MBOX files.
Browse and select the folder containing MBOX files on your system, then click on Choose button.
Now you can see file path and size of the MBOX file. Click on Next button.
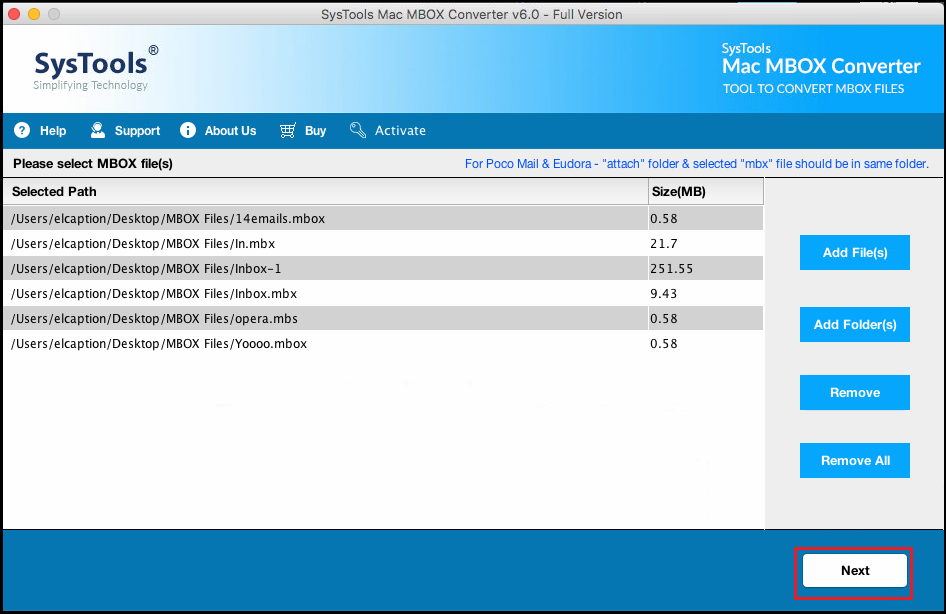
IMPORTANT: For conversion of Eudora & Pocomail MBX emails with ATTACHMENTS, make sure that the .mbx file and attach folder are at the same location. Since Eudora and Pocomail stores attachments in separate attach folder, without it the maintenance of attachments in emails is not possible.
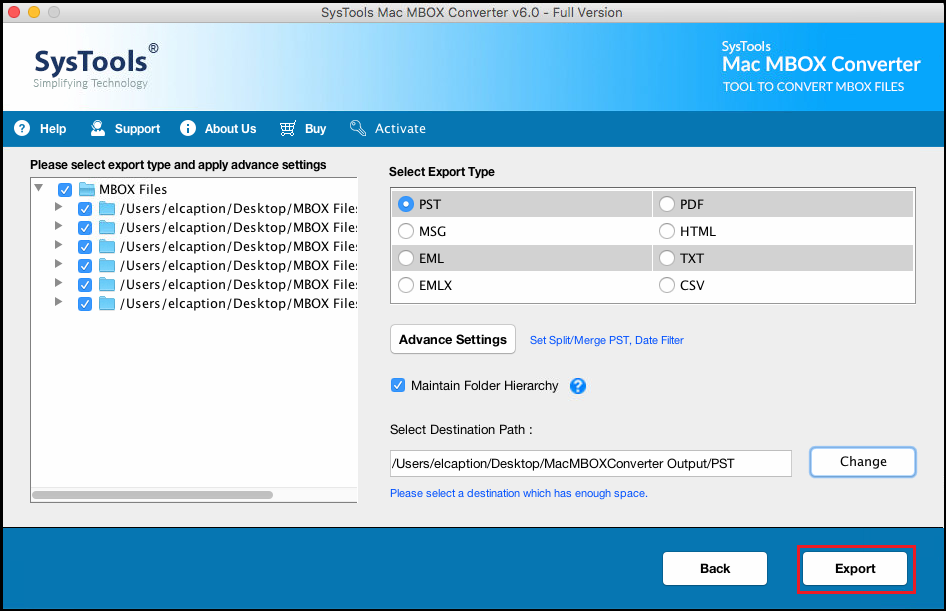
Click on PST radio button to export the files in Outlook PST file format.
Maintain Folder Hierarchy: You can maintain folder structure and keep your data in same way as it was in the MBOX file.
Selective Export: On the left pane, you can select/deselect mbox folders to convert to PST format.
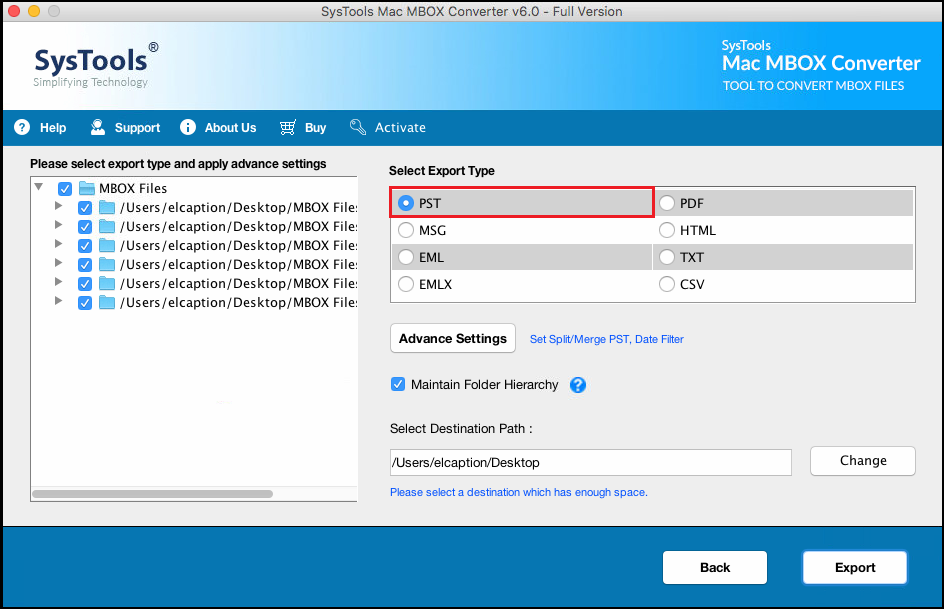
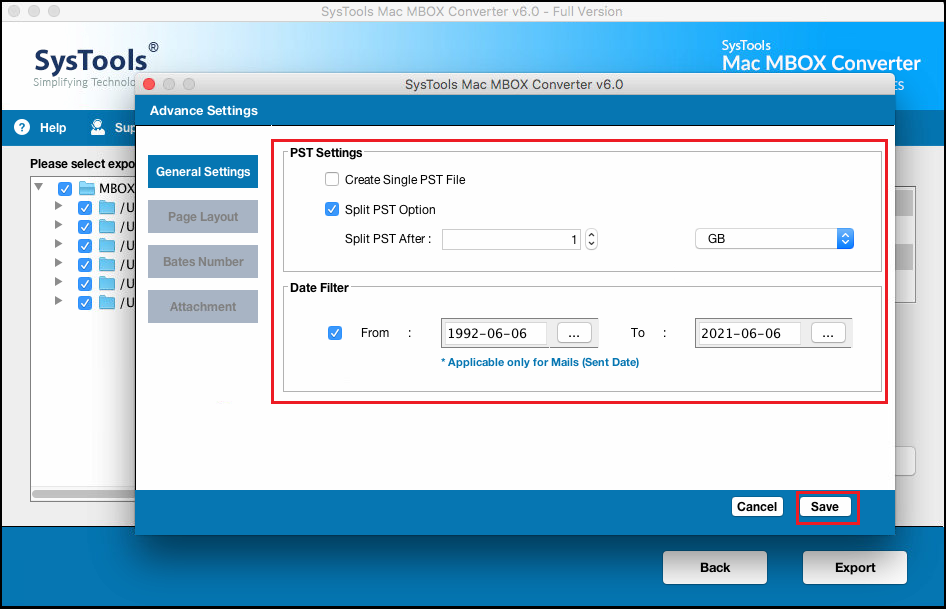
Now click on Advance Settings button for filters and additional features:
- Create Single PST: Checkmark this option if you want to merge all your MBOX files into a single PST file.
- Split PST Option: You can use Split feature to break your output PST file into multiple smaller PST as per required size(MB or GB).
- Date Filters: You can apply Date Filter to select and export email messages of the specific duration.
Click Save button to apply all settings.
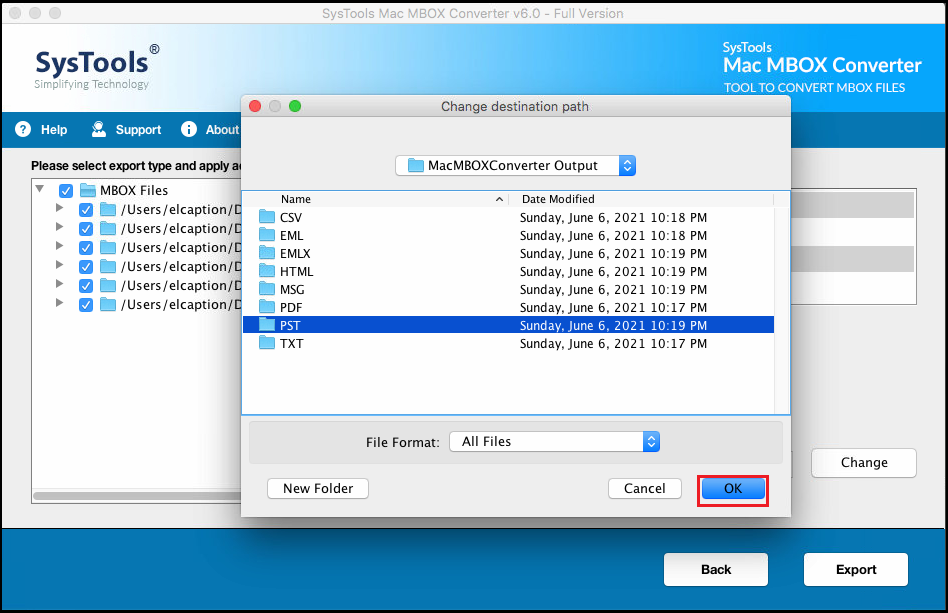
Select Destination Path: Now click on Change button and navigate to the destination location where you want to save the PST file. Click Ok.
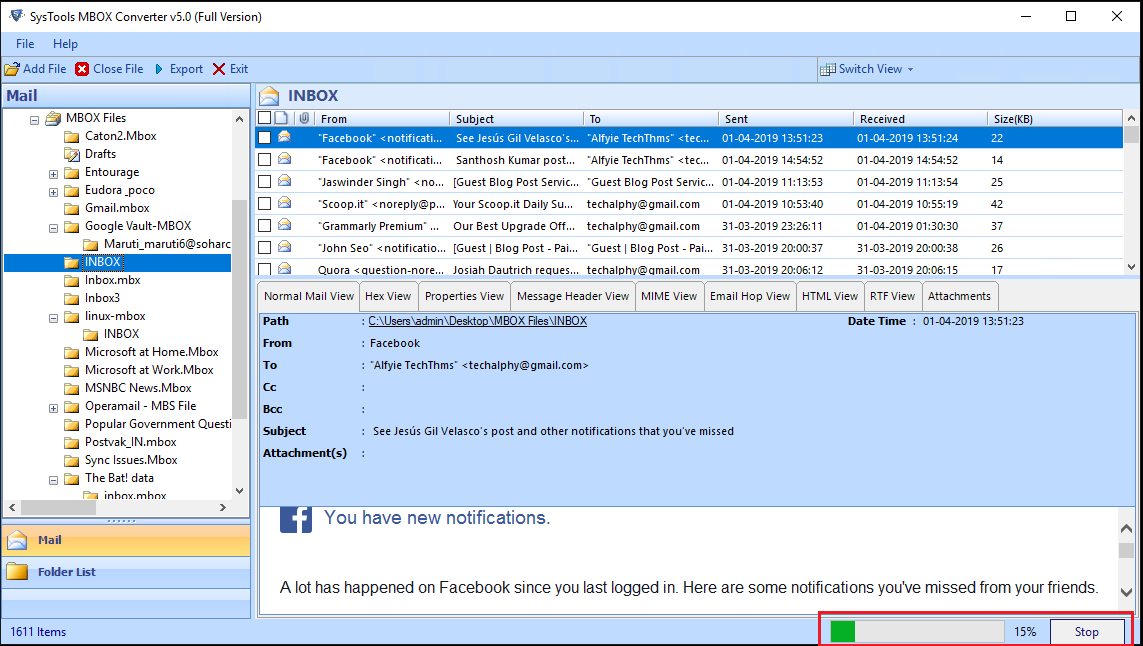
You can see the file path of the destination location. Click on Export button.
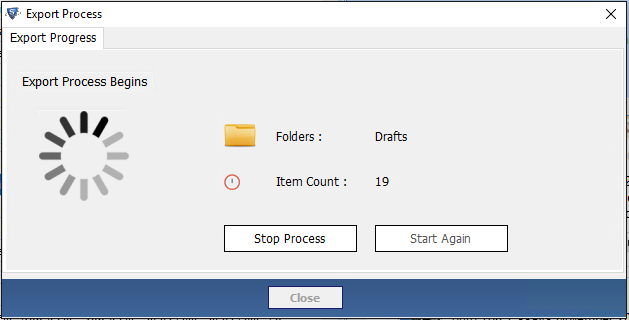
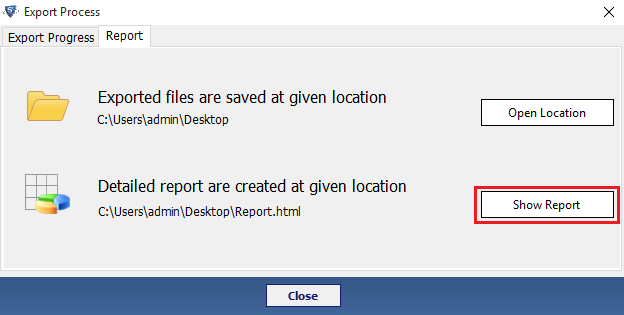
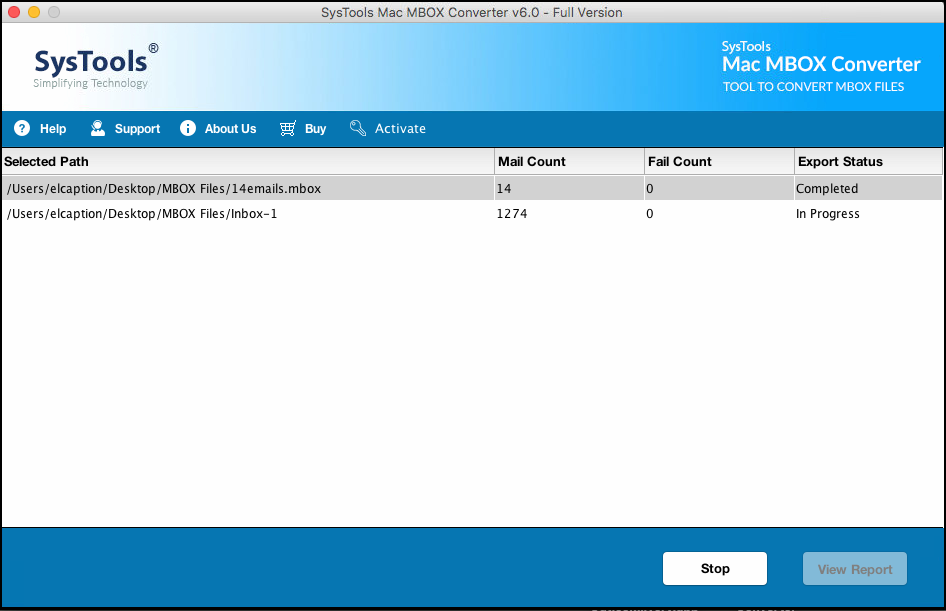
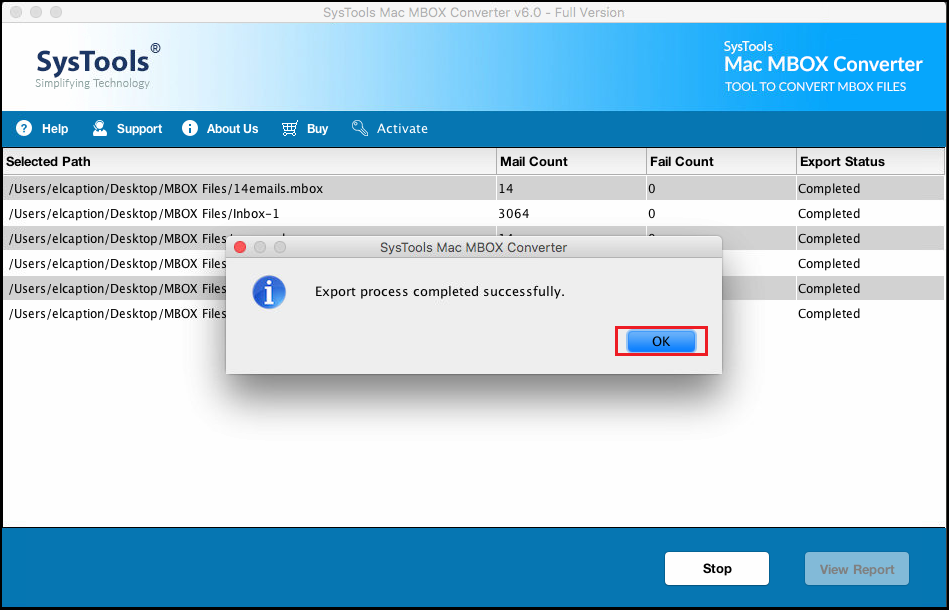
Now Export process will begin. The software will show Mail and Fail Count along with the Export status.
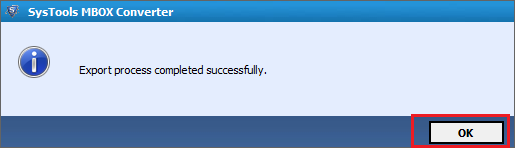
A confirmation box will appear once the export process is finished. Click on OK button.
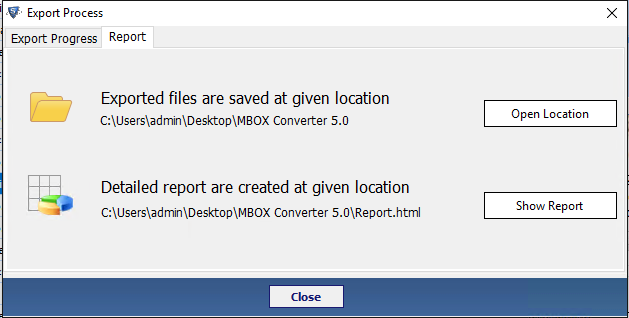
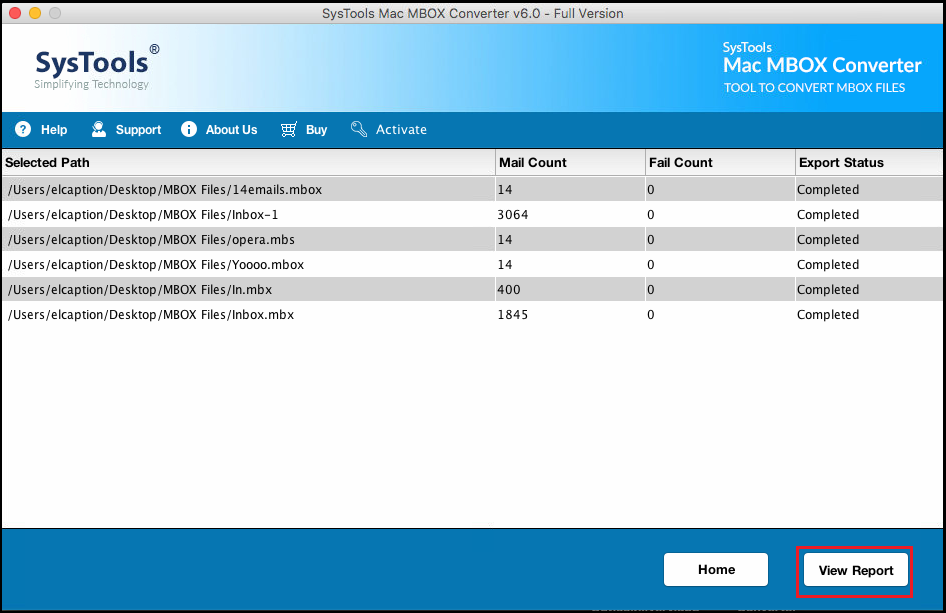
Now, click on View Report to view the Export process Report.
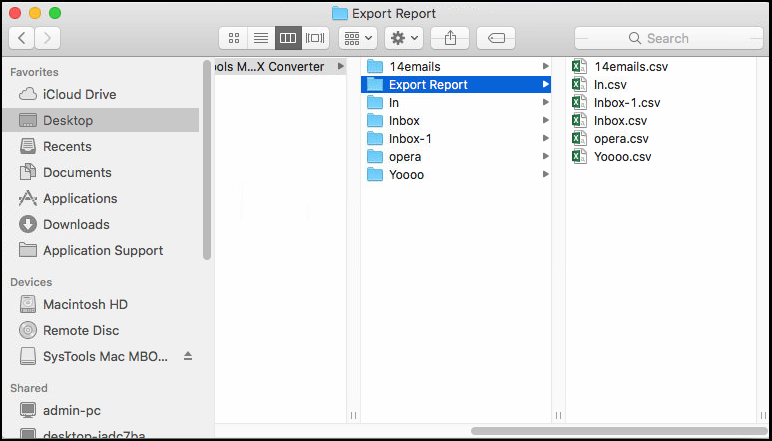
The software will open folder directory. You can see a folder named Export Report is automatically created. Open the underlying CSV file.
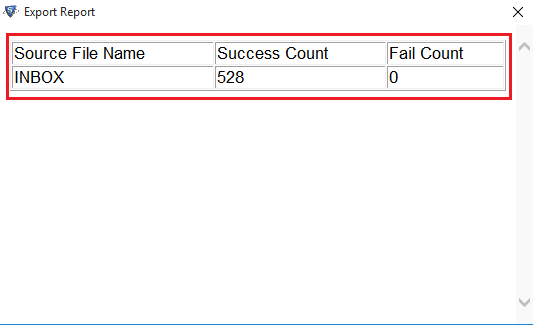
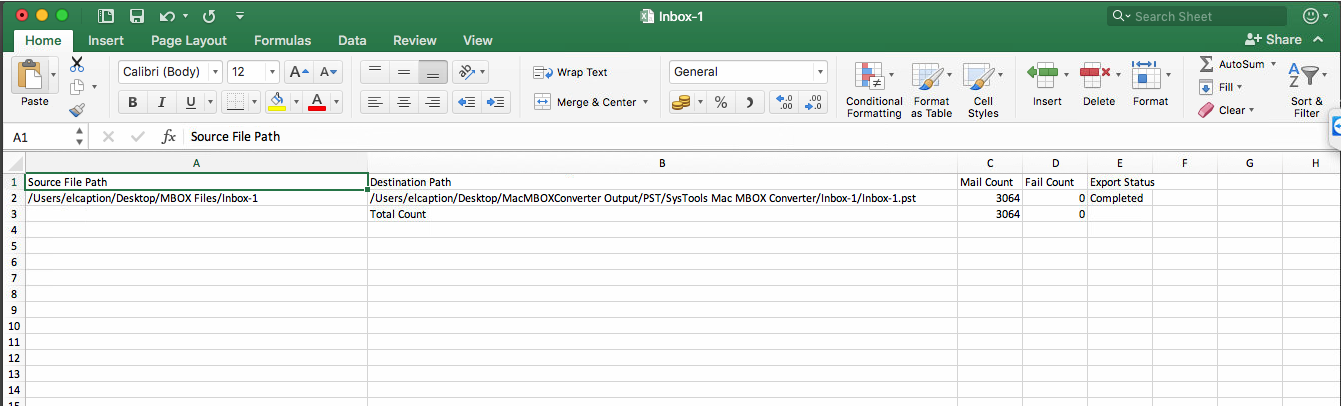
Now you can view the complete process details such as mail count, fail count, source path, destination path, and export status.
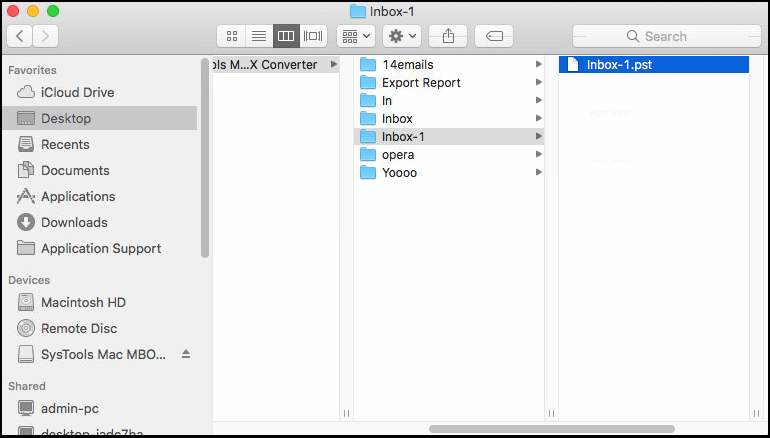
You can check your destination location to find all your MBOX files converted to PST format.
Note: Instead of multiple folders having PST files, there will be a single PST if you chose the Create Single PST option.
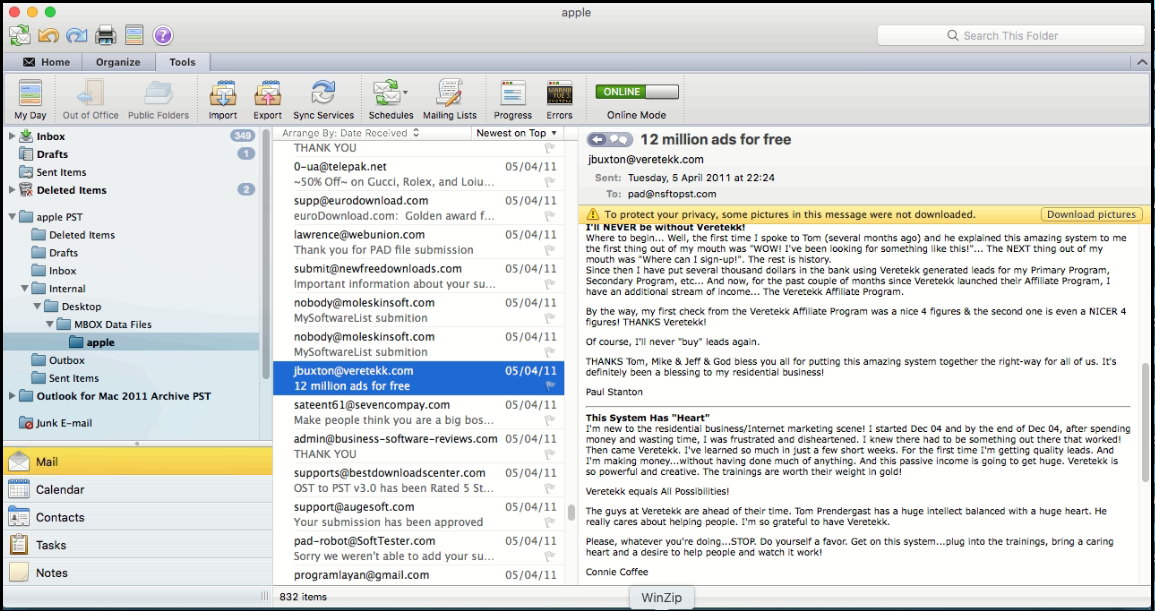
Import this PST file in any Outlook version to access its content.
Note:
Mac OS allows to name a file only upto 255 characters. Any name more than that is not accepted. And there are cases when due to naming conventions, the name of a particular PST file may exceed this predefined range of Mac OS.
The software automatically detects such email files and renames them accordingly. In addition to prevent any confusion, a separate folder is used to store these files.
If such files exist after conversion, you can view LongFilePath.csv for its destination location. These files will be present in a folder named CDTPL.